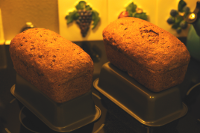
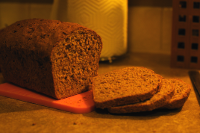
Sprouted Whole Wheat Bread
Baking bread is really not all that hard, mostly just time consuming. After mixing up the ingredients and kneading the dough, the remaining process consists of waiting about for the dough to rise or baking the loaves. Easy Peasy.
To make bread there are only five ingredients necessary - wheat, honey, yeast, salt, and water. Anything beyond that is an adjunct. But today I'm making a sprouted wheat with sunflower and chia seed. The sunflower adds a little nutty taste and the chia adds omega-3 fatty acids.
Ingredients
- 1lb hard red winter wheat berries (organic)
- ~1c raw sunflower seeds (organic)
- 2Tbs chia
- 1/3c raw honey
- ~1tsp salt
- 2tsp bread yeast
- 1/4c water
Sprouting the wheat berries does add to the bread making procedure and as far as I am concerned, adds to the flavor and texture of the bread. Sprouting is fairly easy with the right equipment. I have tried sprouters ($$$) and looked into sprouting bags ($$), but after rooting around the kitchen, I came across what I consider the ideal solution. I use a stainless steel sieve that fits inside a stainless steel pot.
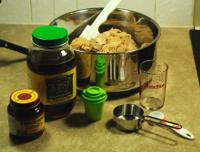
I usually start the sprouting early in the morning - say 6 AM. This seems to time the sprouting and baking just right, ending around 5 PM the following day.
~6 AM
Dump the wheat berries into the seive and rinse well with warm tap water. Let it drip for a bit then place the sieve with the berries in the pot. Cover the berries with warm tap water, cover the pot and set aside for about 12 hours.
~6 PM
After the time has past you'll see that the berries have swollen some. Now remove the sieve and berries from the pot and rinse with warm tap water again. Let it drip a little and then set it aside. Dump the water from the pot. You'll notice that it is brownish and a bit dirty. Rinse the pot out and wipe dry. Do not cover berries with water. Place the sieve and berries back in the pot, cover and set aside.
Next Morning ~6 AM
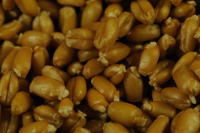
Now repeat the procedure from the evening before - rinse berries and place back in the pot. Cover pot. Again, do not cover berries with water. You may notice that the berries are just beginning to sprout some. Wait some more, maybe 5-6 hours.
~11 AM / Noon
Let's make some dough!
Now the berries should be ready. You'll notice that the germs have sprouted, but not too much. Just enough to have started producing enzymes. To grind the berries, I use a Cuisinart food processor. I tried a Wonder Jr. grinder with some success, but the berries had problems feeding into the grinder throat. With the Cuisinart, I put about a third of the berries in and apply power. Letting it cut the berries into a dough. Dump the results into a mixing bowl which for me is the same pot I used for sprouting. Repeat the grinding procedure for the remaining sprouts.
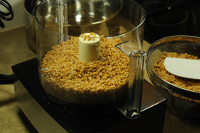
Now add the remaining ingredients. Dissolve the 2 tsp yeast in a 1/4 cup of warm water. Most likely proofing is not necessary. Set aside. Add a 1/3 cup of honey to the mass in the mixing bowl. Here I usually use a spoon to clean the honey out of the measuring cup. Then pour some of the yeast mix in the measuring cup to rinse the any honey left there into the mixing bowl. I do this until the yeast mix is gone. That way I get all the honey goodness into the dough for feeding my little yeast buddies and make the bread sweet. Add some salt so the bread won't taste flat. I can't tell you how many times I've messed this up, so I speak from experience.
If there are no adjuncts, it is time to knead the dough. for this bread, I am adding about a cup of raw sunflower seed and a couple of tablespoonfuls of chia.
Throw a little flour on the counter, dump the works on the counter and start kneading. What I do now is squish the mass with my hands to mix everything together, not really kneading just yet. At this point it is very tempting to keep adding flour to kind of dry up the dough. Don't get over zealous. It is better to leave the dough a little sticky and wet. It will make the rises much better later on. So for now just mix in the flour that is on the counter maybe adding just a tad more, but that is it. When the kneading starts, the dough will absorb the moisture and become nice and supple.
Kneading for me takes 15 to 20 minutes. The whole idea is to stretch out the gluten allowing the bread to rise and hold together. Otherwise, just go make cookies.
Kneading is pushing down on the dough while rolling the mass forward allowing the dough to squeeze and roll out from under the palms of my hands. I repeat this motion until the dough is a long weenie thing, turn the dough 90 degrees, fold up into a ball-ish mass and continue kneading. I do this for about 15 to 20 minutes. This may seem a little long, but I would rather err long. The dough will most likely seem soft and supple, but I want the gluten to be well stretched. The wheat bran will fleck the dough nicely.
Put the dough in a large bowl for the first rise. Back in the day I had a gas oven with a pilot light. This worked well. Just cover the bowl and place in the oven. Those days are gone. Now I have an electric unit. So what I do now is place the covered bowl in the oven with a cake pan of hot water placed above the bowl to warm the oven. I have found this to work very well. It also has the added benefit of keeping the rising dough from dying out. Putting the hot water above the bowl seems to warm the dough more evenly too. This will become more evident later with the final rise in the loaf pans.

Now wait about and hour and a half. The dough should be about twice the size. Poke with a finger and see if it leaves a nice indentation. It should *sigh* a bit. It's ready. Punch the dough down and enjoy the aroma! I'll remove the dough and lighty knead it some. Place back in the bowl and do a second rise as before. I replace the water with fresh hot water. the second rise should be faster than the first, maybe about an hour this time.
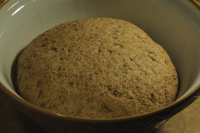
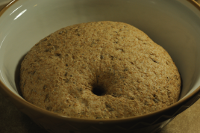
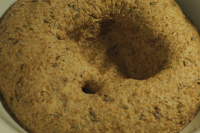
After the second rise, do the finger pokey thing to check. Again, punch the dough down. This time I cut the dough in half. Take half and lightly knead it some, press out flat by hand or use a rolling pin to roll out flat. Take the flattened dough and roll up into a loaf shape and set aside. Do the same for the other half. Set aside and let the little pigs rest for a few minutes.
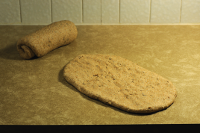
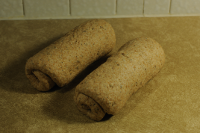
While waiting on the resting dough, grease up the bread pans. I use butter because I love butter! Place the rested loaves in pans. This will be the third and final rise. Place back into the oven, cover and replace cooled water again with hot water. Wait for the rise to complete - about an hour.
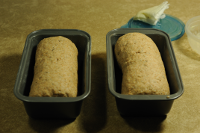
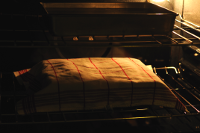
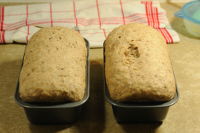
In the home stretch now.
Hopefully the loaves are nicely risen. Take the loaves and the cake pan of water out of the oven. Set the oven to 350. at this point I use to brush the loaves with melted butter. but lately, I've gotten out of the habit. I think for sprouted wheat bread, it just makes the crust too thick.
Anyway, when the oven is up to temp, place the loaves on the middle rack. Set a timer for an hour. Enjoy the wonderful aroma while baking!
After the hour passes, pop the oven open. When the bread is done, tapping the loaves will sound hollow. Take the loaves out of the pans to cool. Don't cut too soon as tempting as it is. But wait a little and the bread will harden and cut much easier. Enjoy!
